Step 1: Create image blocks in Adobe Illustrator
In Illustrator, go to Files>New. In the presets details, input the size of your artboard. I used 1920 px by 510 px for my project. Click on More Settings.
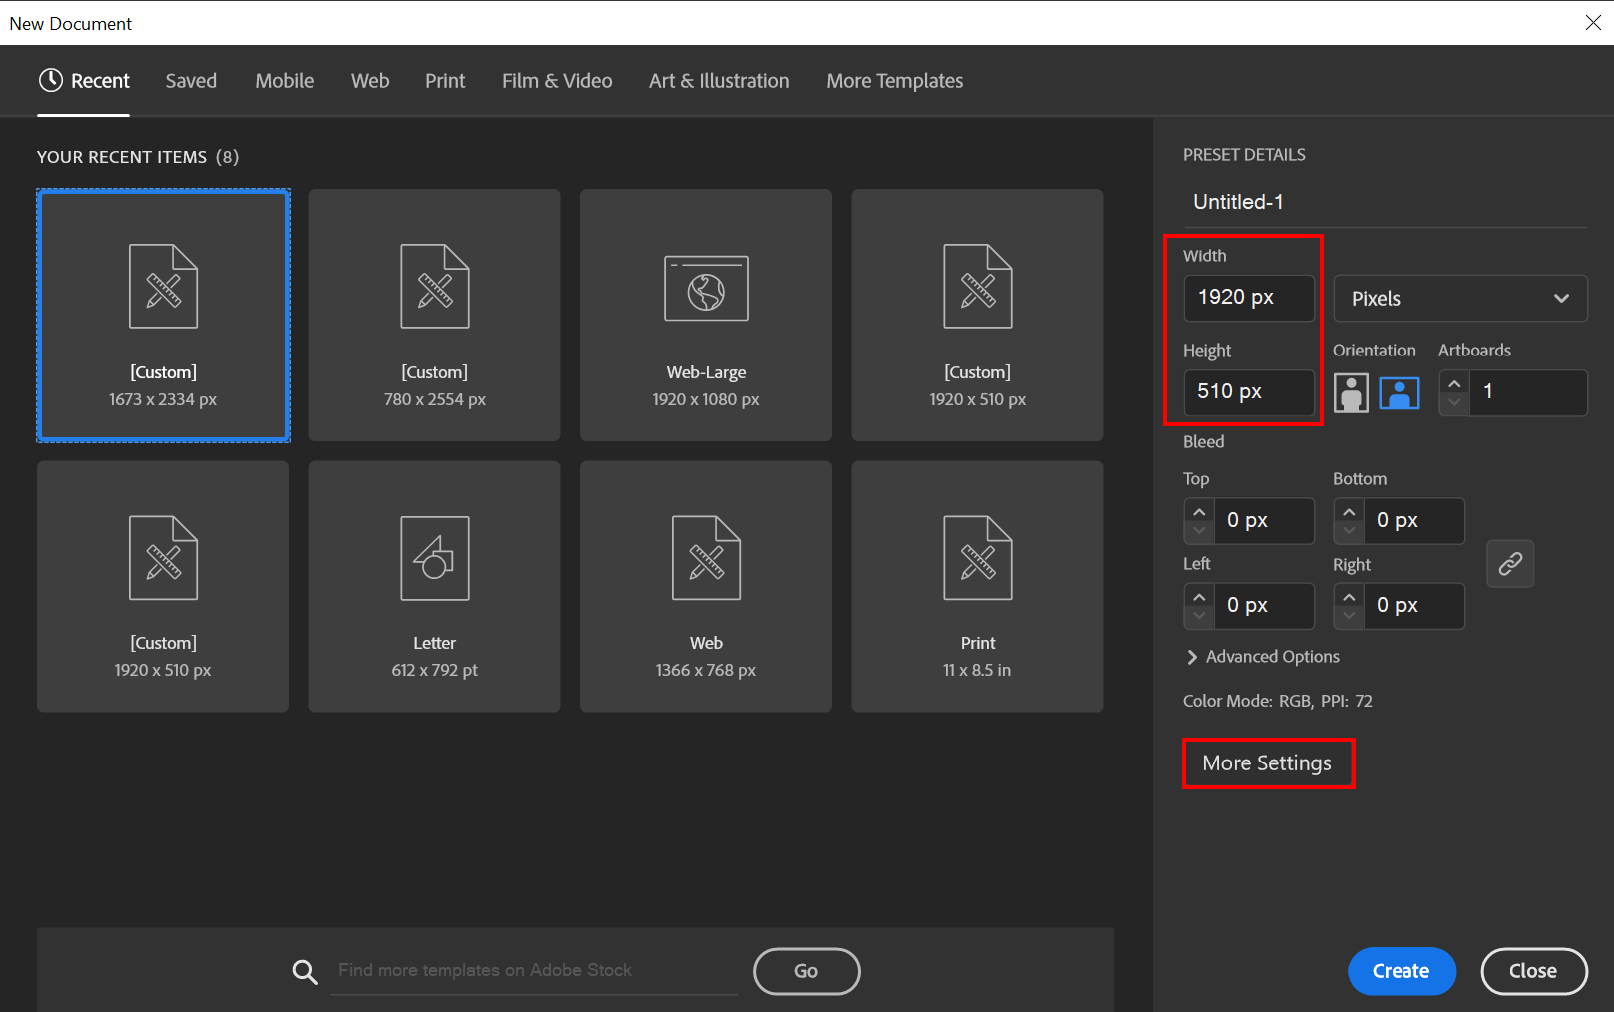
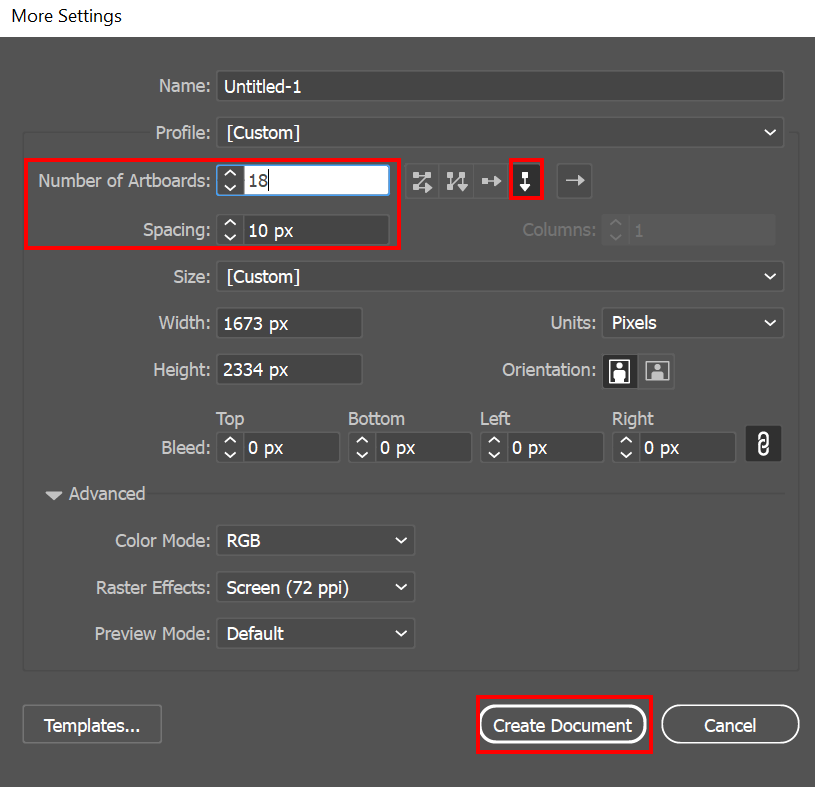
In More Settings, input the number of artboards you need (= how many image blocks you want in Rise). In my project, spacing between artboards mattered so I adjusted this as well. Select the direction in which you’d like the artboards to display and click Create Document.
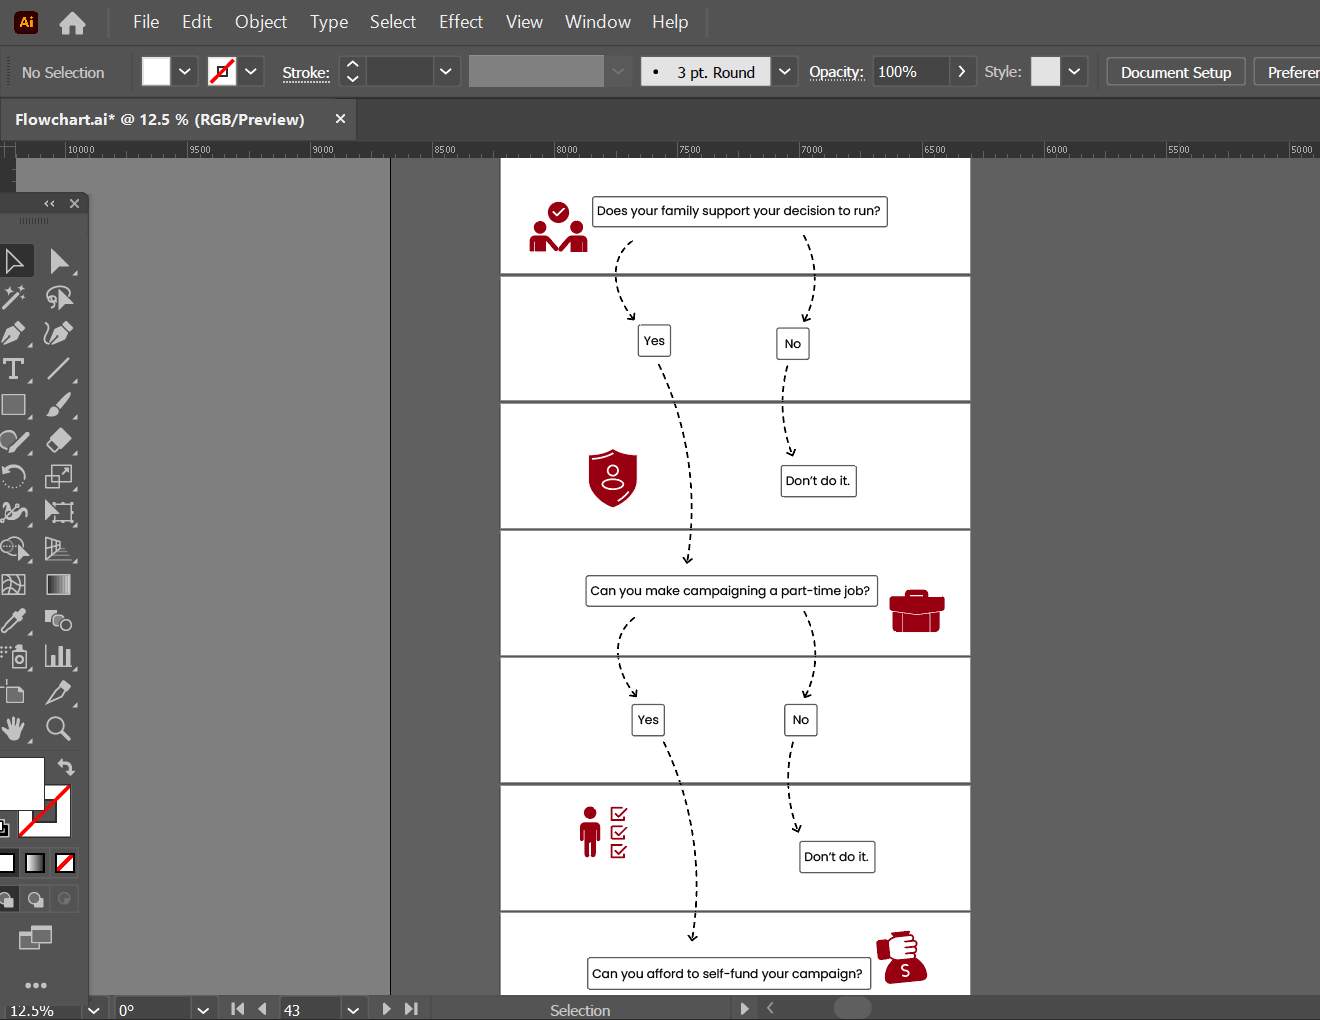
Add your text and vector files so that it looks like one long image:
Step 2: export all your images
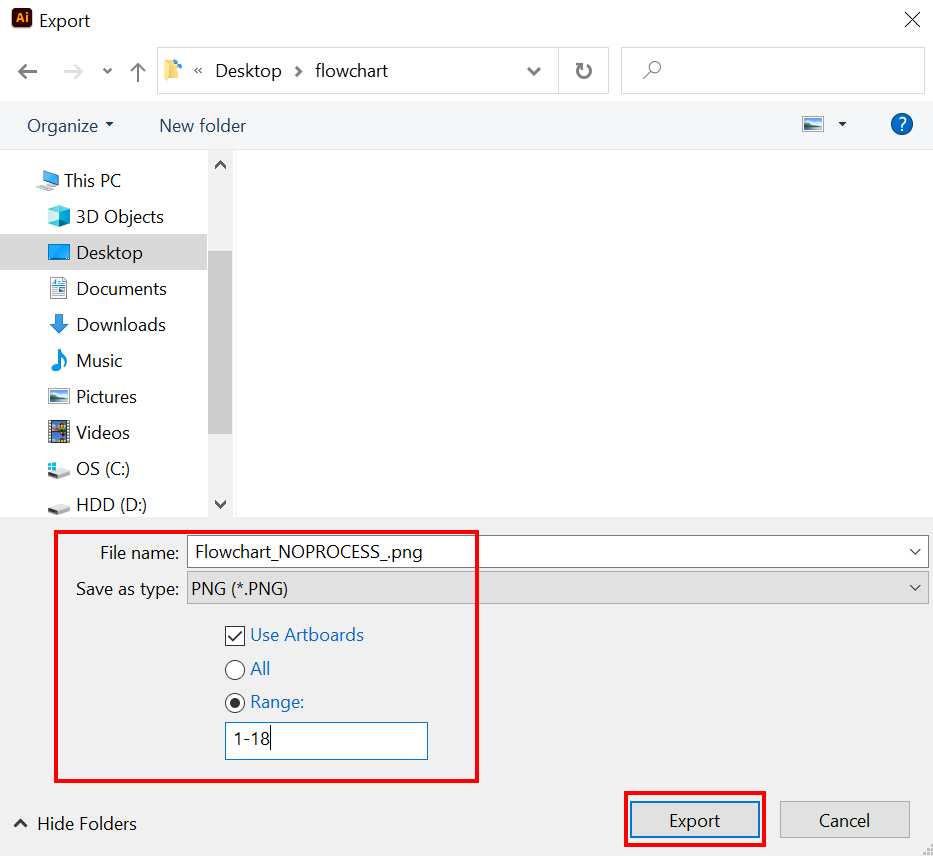
When you’re done, click on File>Export>Export As.
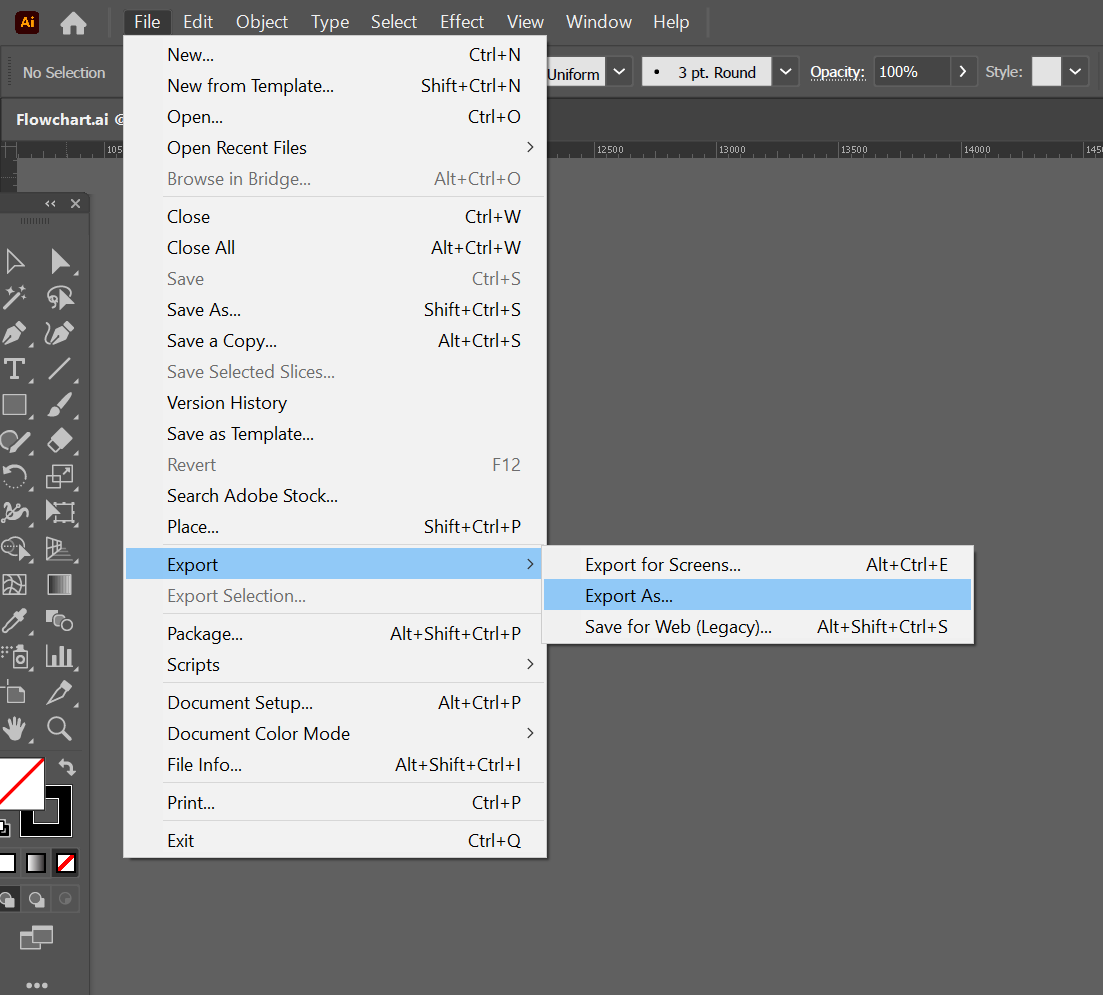
Important: Rename your file so that it contains the words “_NOPROCESS_” in it. Otherwise, Rise will compress it and your image quality will be bad, no matter how high your resolution is.
The range means it will export artboard 1 to artboard 18. If you just want to export one artboard, input its number here instead.
Then click on Export.
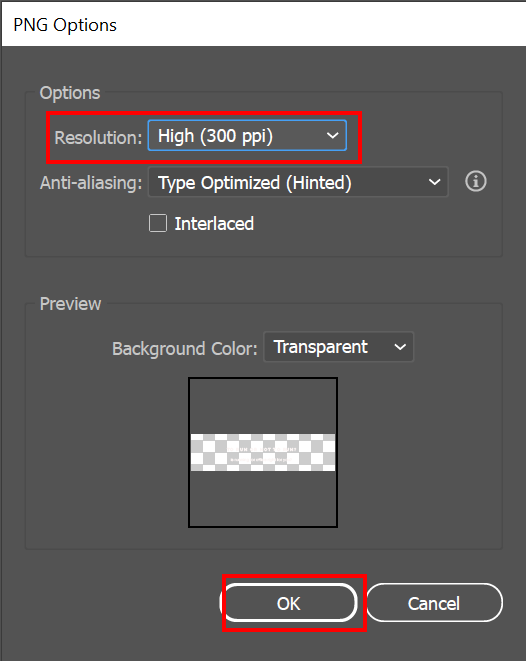
PNG options will display. Make sure it’s set to the resolution you want.
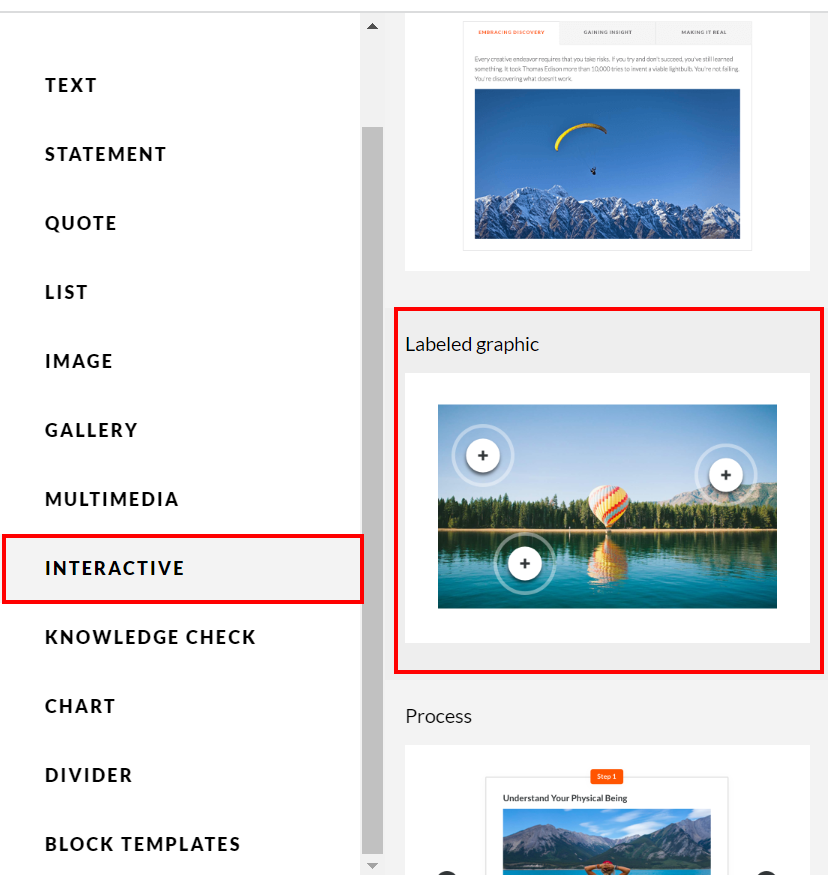
Step 3: upload your images to Rise360
Go to Rise360 and create a new blank lesson.

In the block library, go to the interactive section and select the “Labeled graphic” block.
Click on edit and upload the first image of your flowchart.

Edit the markers (the pop up buttons) with your content and click on close.

Hover over the image and click on settings.
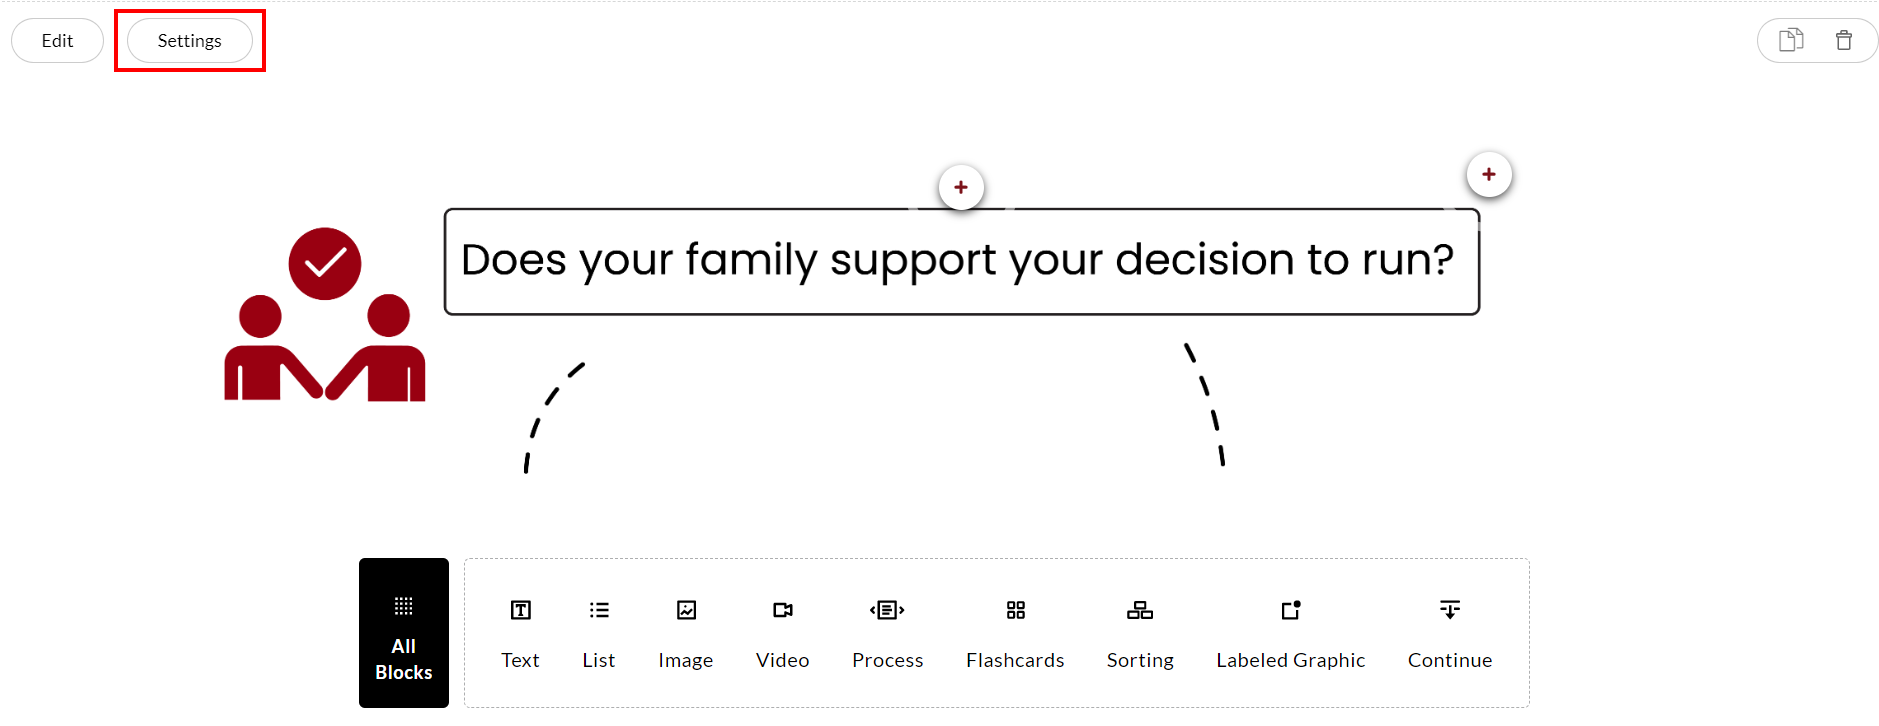
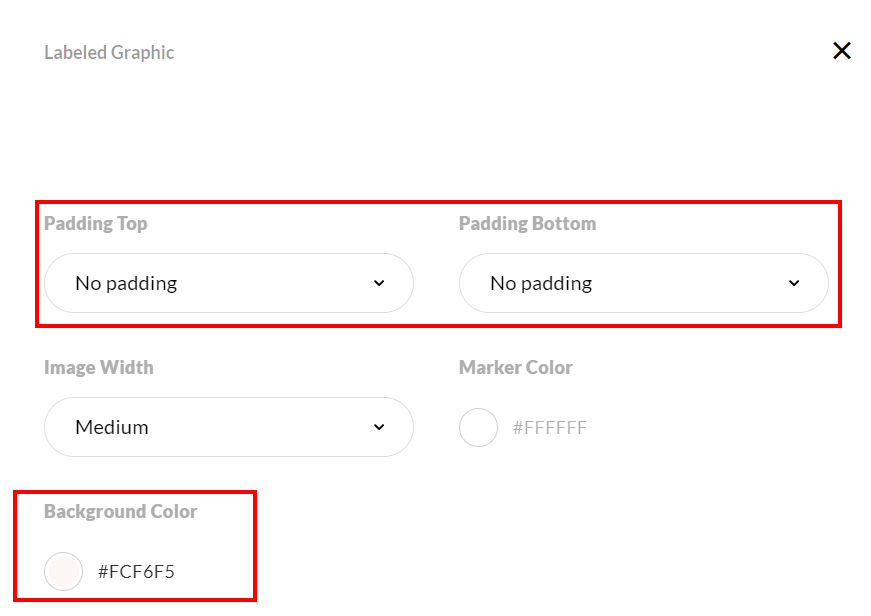
Set the padding top and bottom to none and change your background color if needed.
That’s it! Just rinse and repeat for all your image blocks.