How to make Storyline keyboard accessible
Not everybody can use a mouse. Some people have carpal tunnel syndrome, a broken arm, or cerebral palsy. Others are blind or have low vision and may rely on a screen reader to access websites. They navigate through content using the keyboard, so if a site or app is not keyboard accessible, it can be difficult or impossible for them to use.
As someone who uses a mouse all day, excessive clicking can be very tiring and annoying. Because of this, I prefer to use my keyboard whenever possible, as it allows my clicking hand to rest.
This quick tutorial will allow you to navigate through your Storyline file without having to click. You could even remove the previous and next buttons entirely.
Keyboard accessibility can improve the overall experience for everybody, and I wish Storyline had made things easier for us to implement it.
Note: I’m using an older version of Storyline to demonstrate this. You might notice a slight change in the appearance of the triggers, but otherwise, everything will work the same.
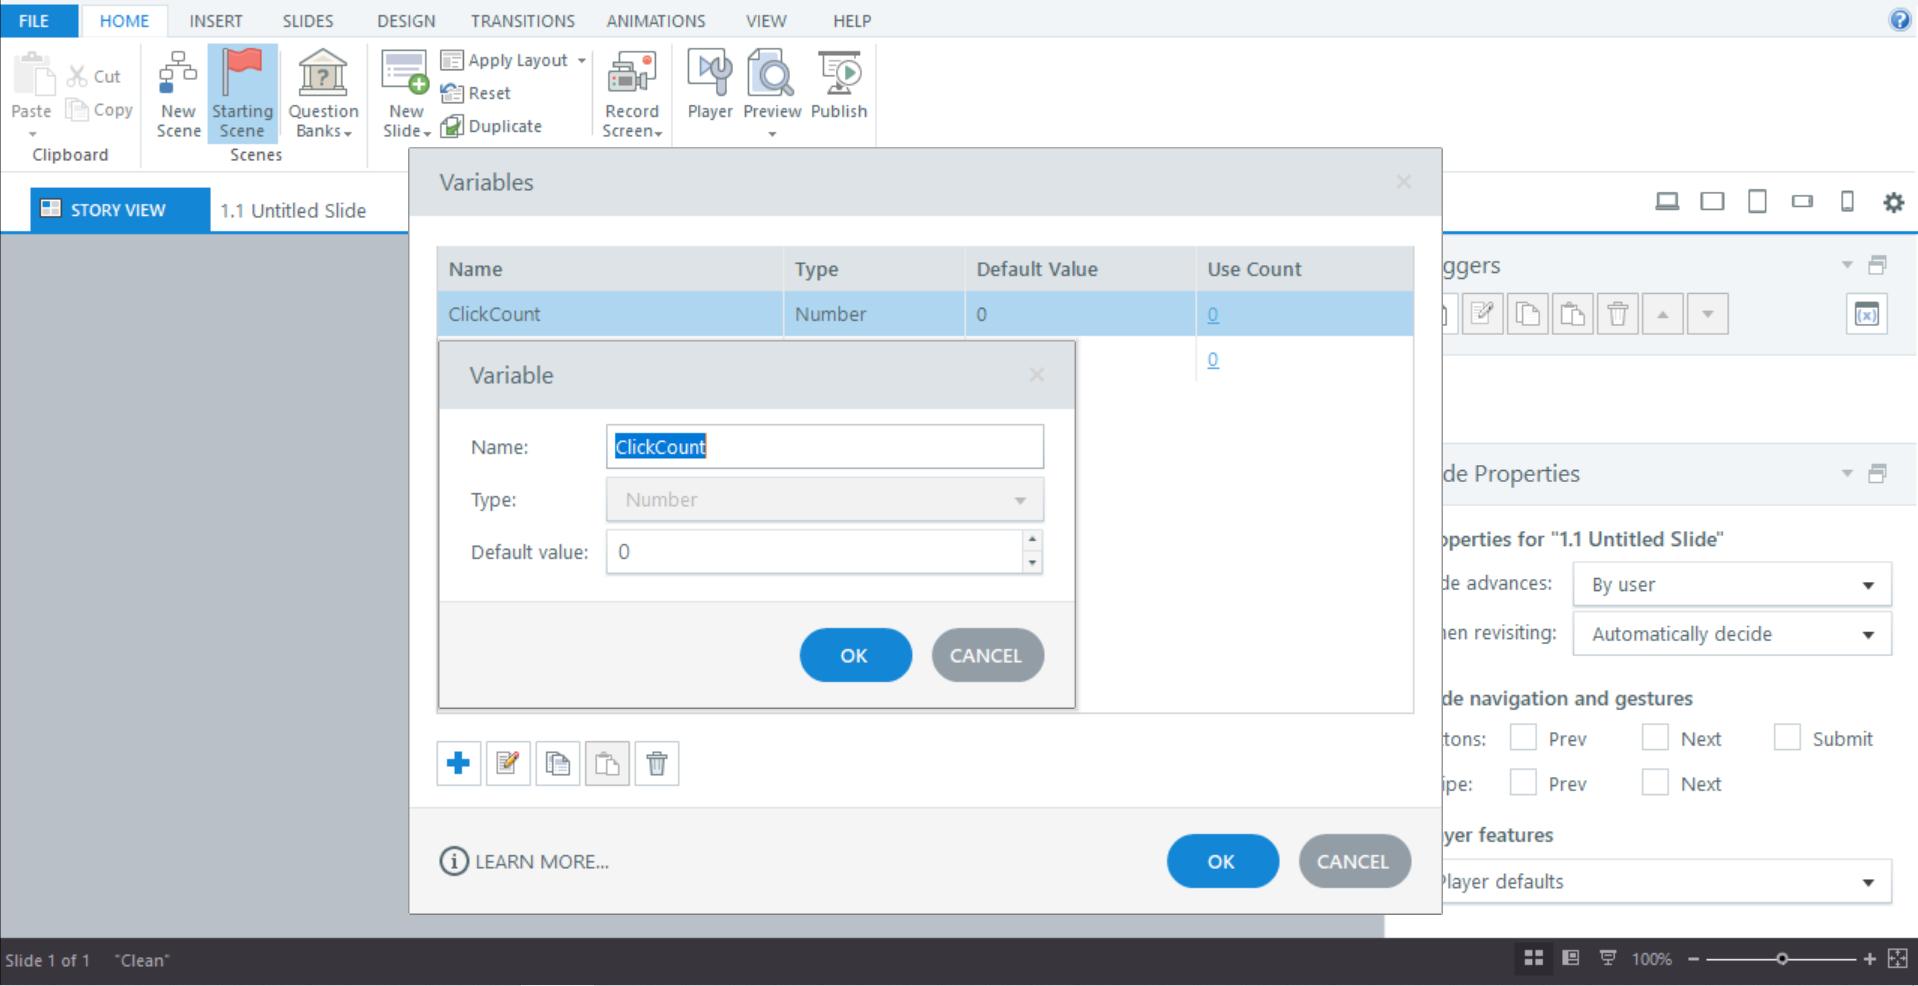
Step 1: create a number variable called “ClickCount” and set its default value to 0.
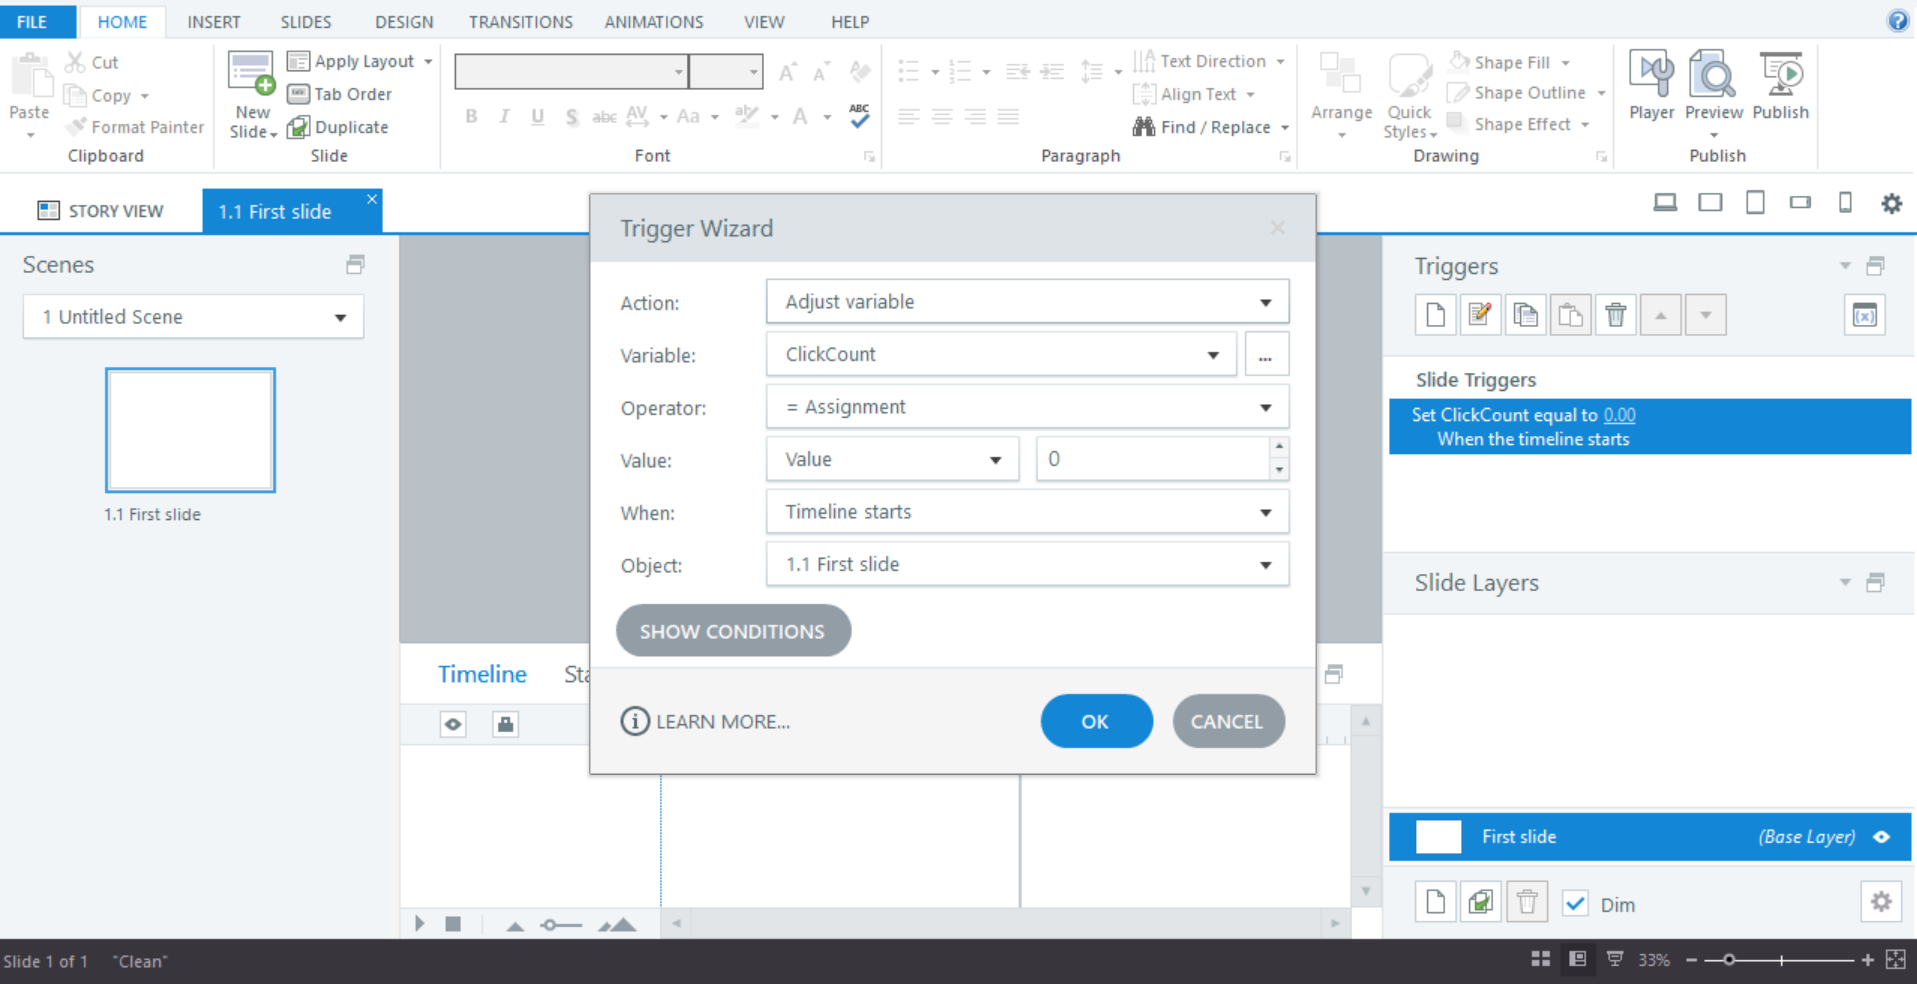
Step 2: on your first slide, create the following trigger:
Adjust variable
Set ClickCount to value 0
When the timeline starts on this slide
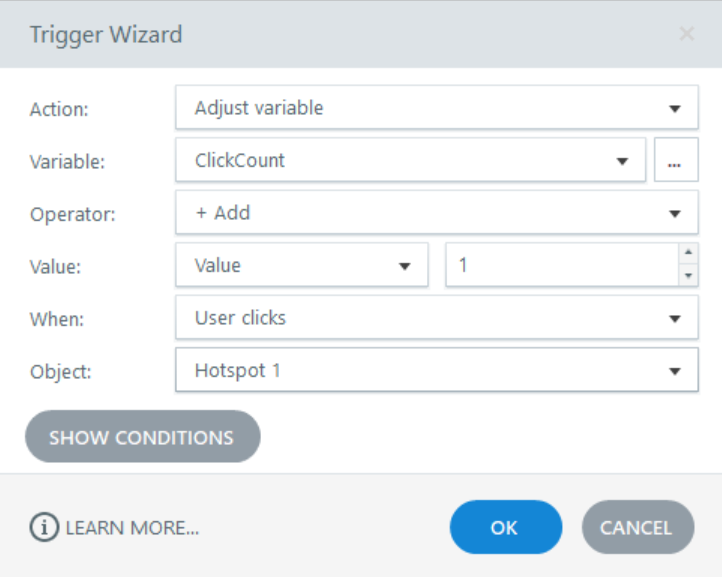
Step 3: on the same slide, create another trigger:
Adjust variable
Add value 1 to ClickCount
When the user presses *tap a key on your keyboard* on this slide
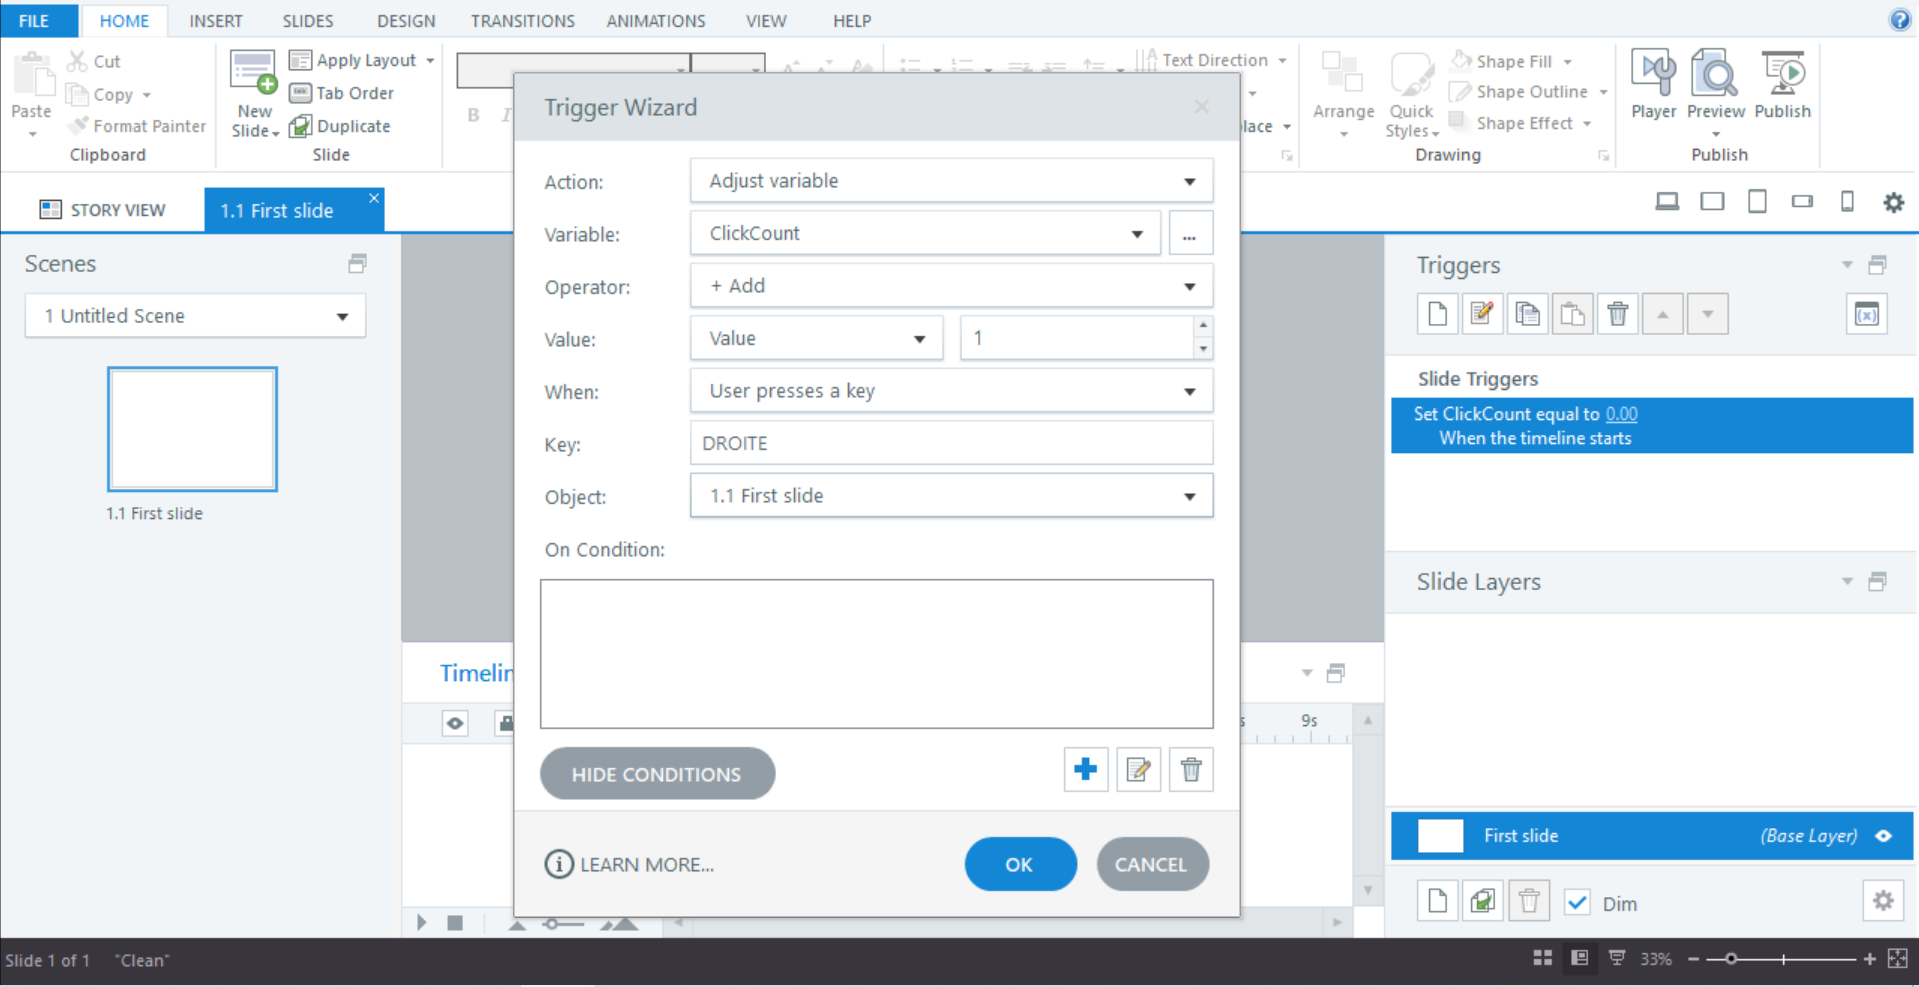
Note: I’m using a French keyboard, so “droite” in my example just means I pressed the right arrow.
Step 4: copy paste this trigger on the same slide, and repeat with all the keyboard keys you wish to include
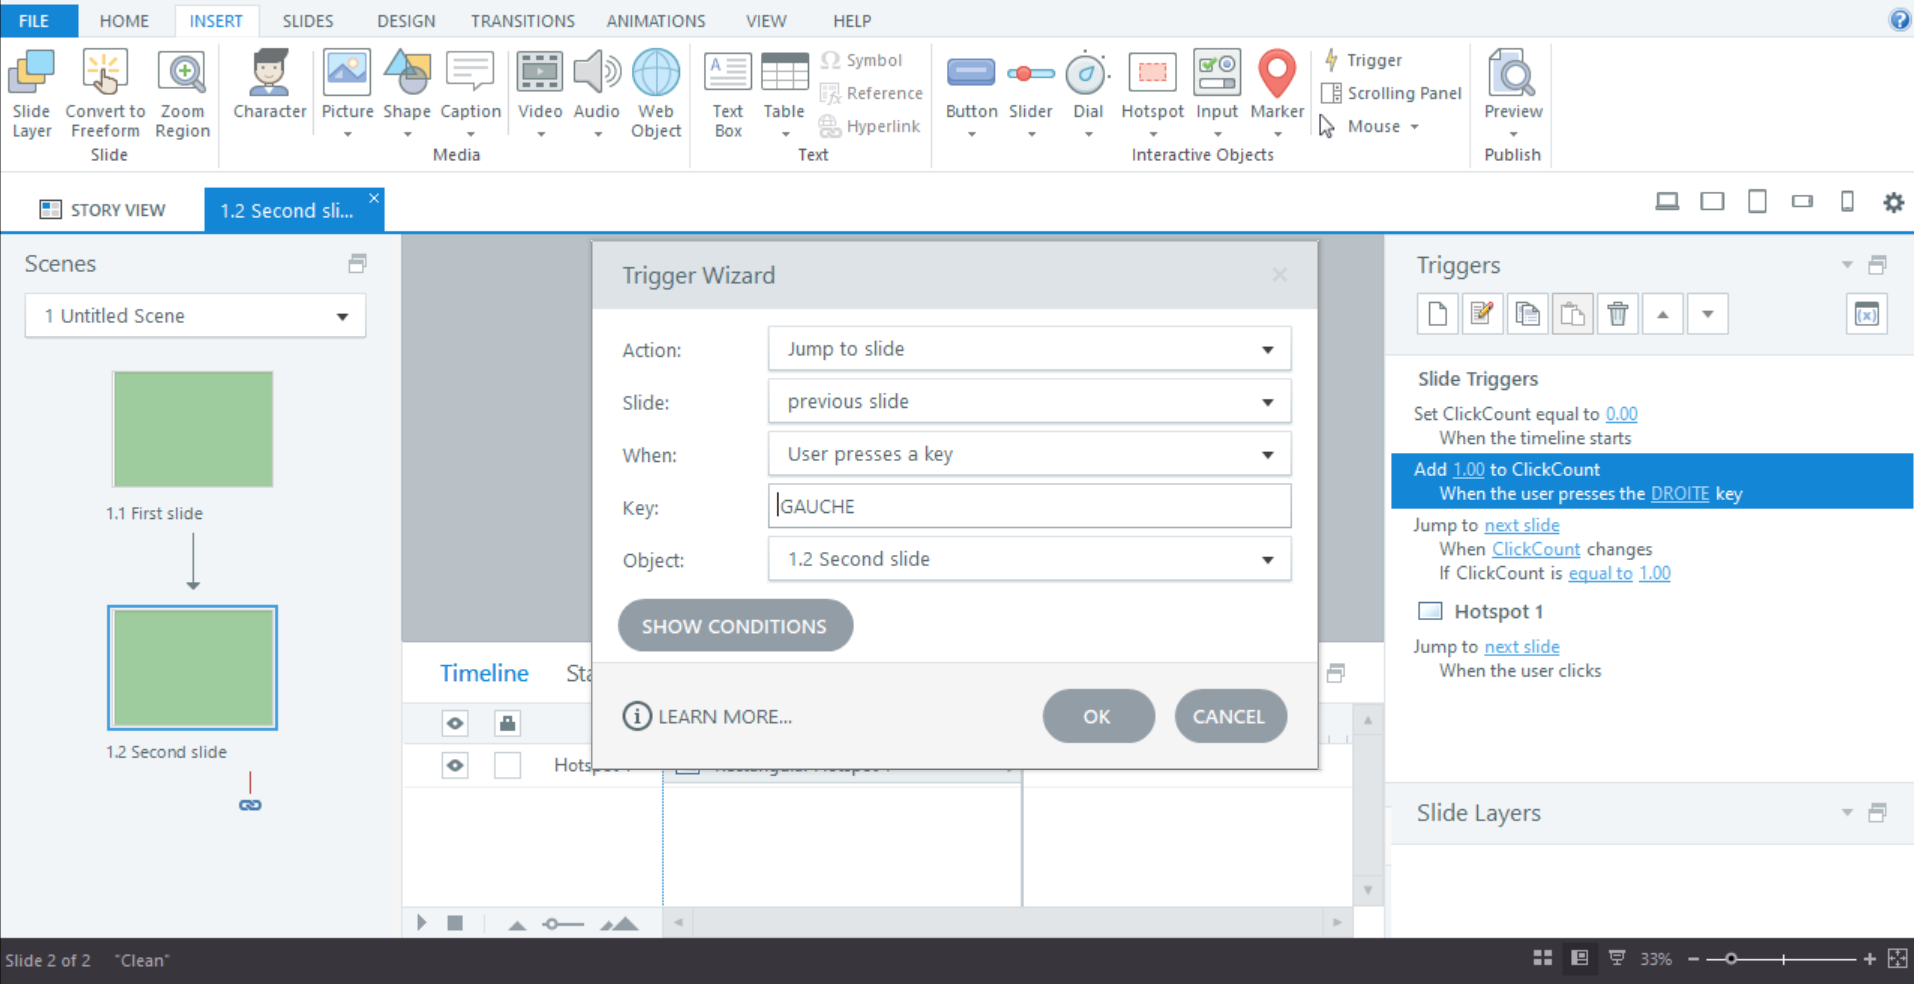
Step 5: Create a new variable trigger.
Jump to next slide
When the variable ClickCount changes
If ClickCount = value 1

Optional - Step 6: Make it easier to click
If people want to use their mouse, make it easier for them. Instead of having them click on tiny buttons, you can create a hotspot on the whole page. Make sure this layer is on top of all the others in the timeline, and create a new trigger:
Jump to next slide
When user clicks Hotspot

Then this trigger:
Add value 1 to ClickCount
When the user clicks Hotspot 1
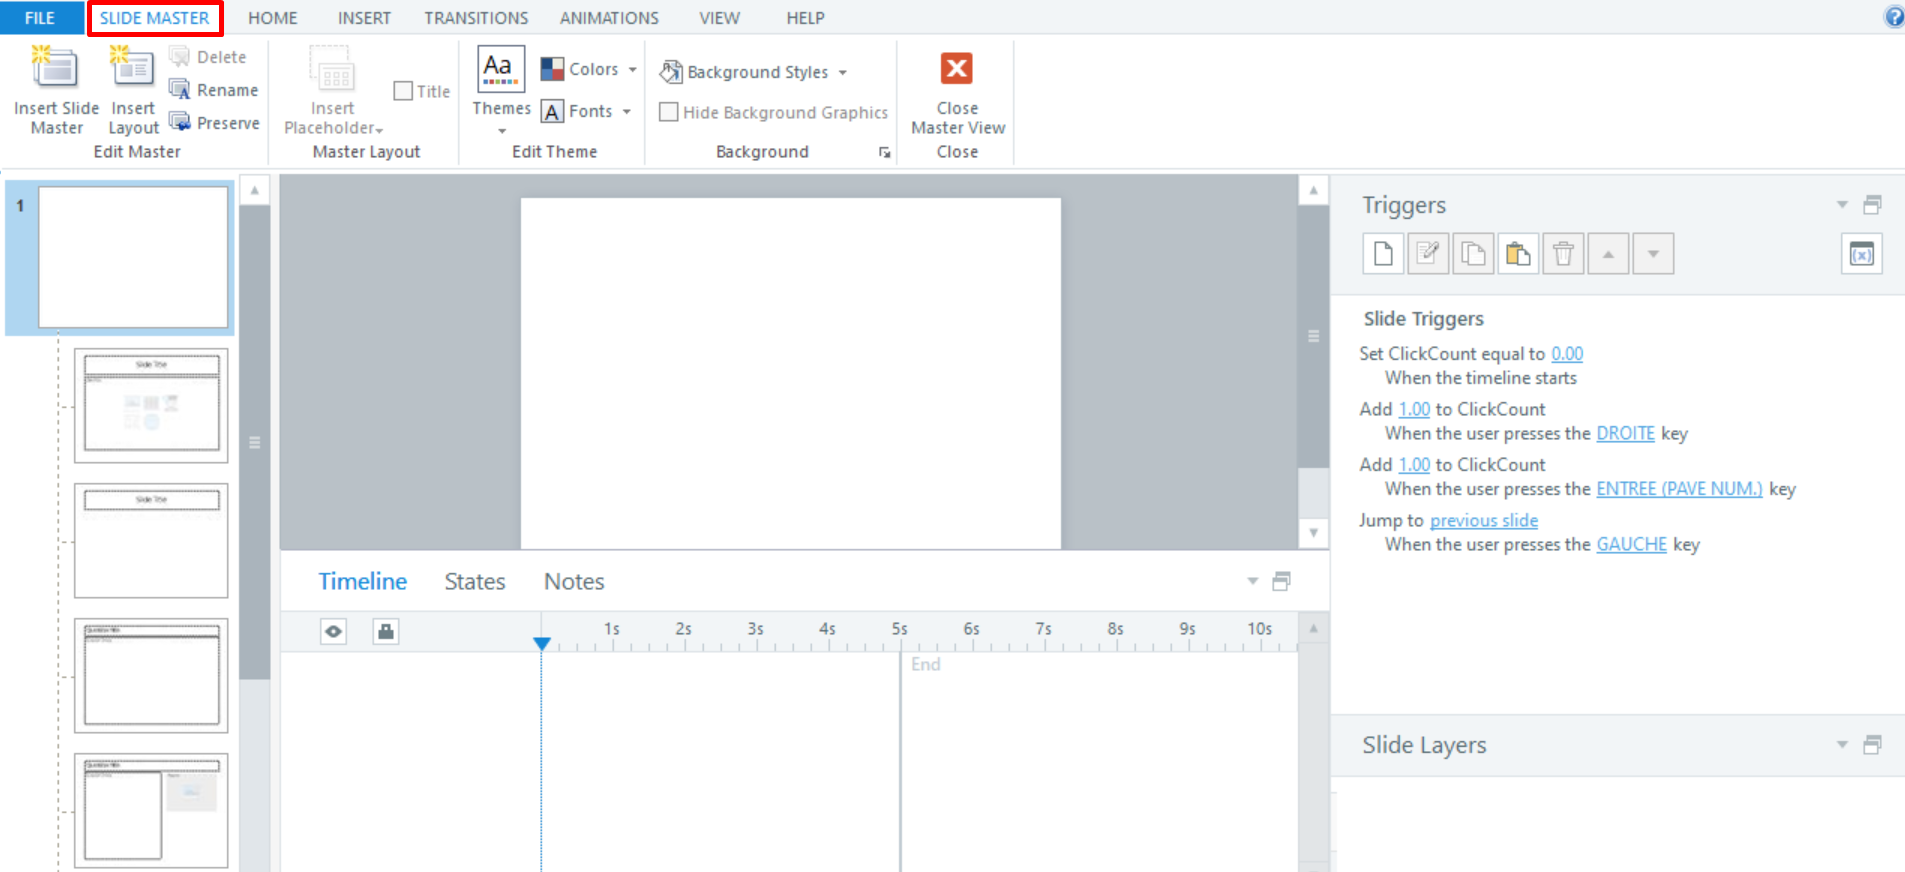
Step 7: Apply all these triggers (steps 2 to 6) to every slide. Optional: Put some triggers on the Master slide
Put some of these triggers on the Master slide to save yourself a lot of copy-pasting. Remember that whatever you put on the Master will reoccur on every page. This is why you can’t put any trigger that checks if ClickCount changes.
If you have animations:
Let’s say you have a textbox on your slide. You want a 2nd textbox to appear after 1 click/keyboard press and the 3rd textbox to appear after a 2nd click/keyboard press.
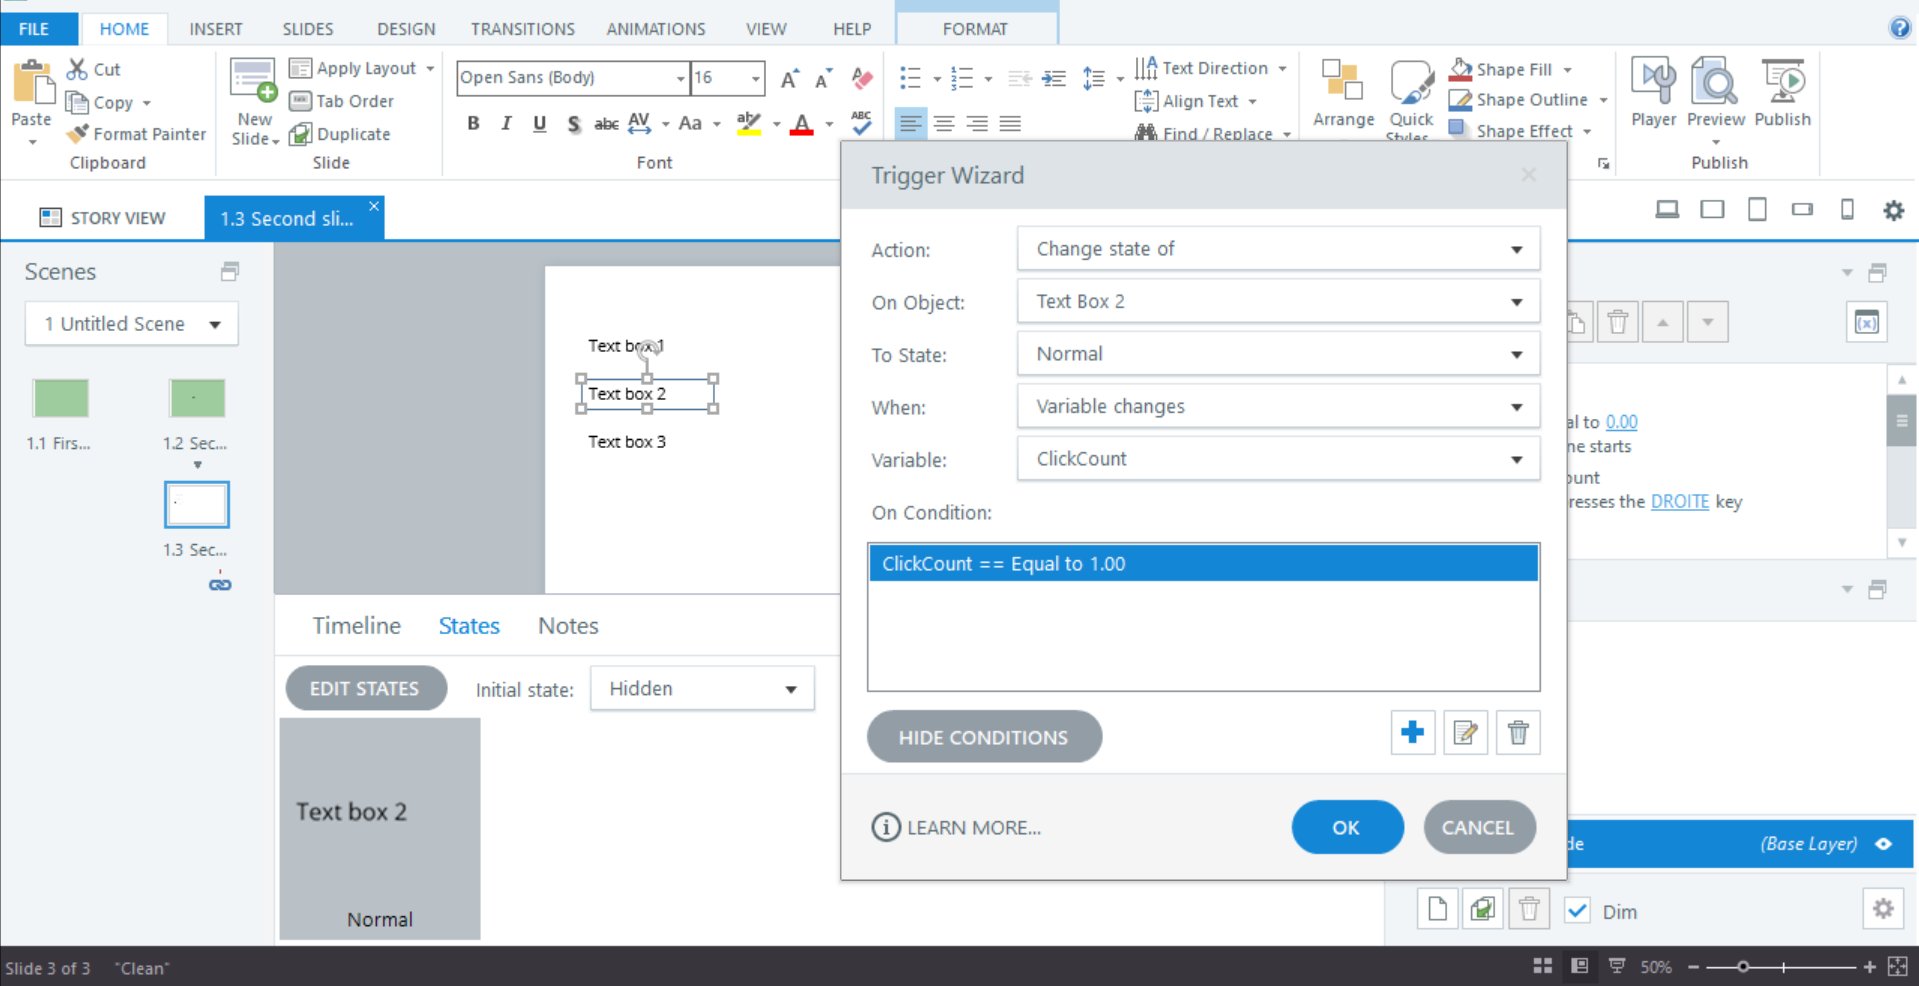
First, select the shape, go to states and set the initial state to hidden.
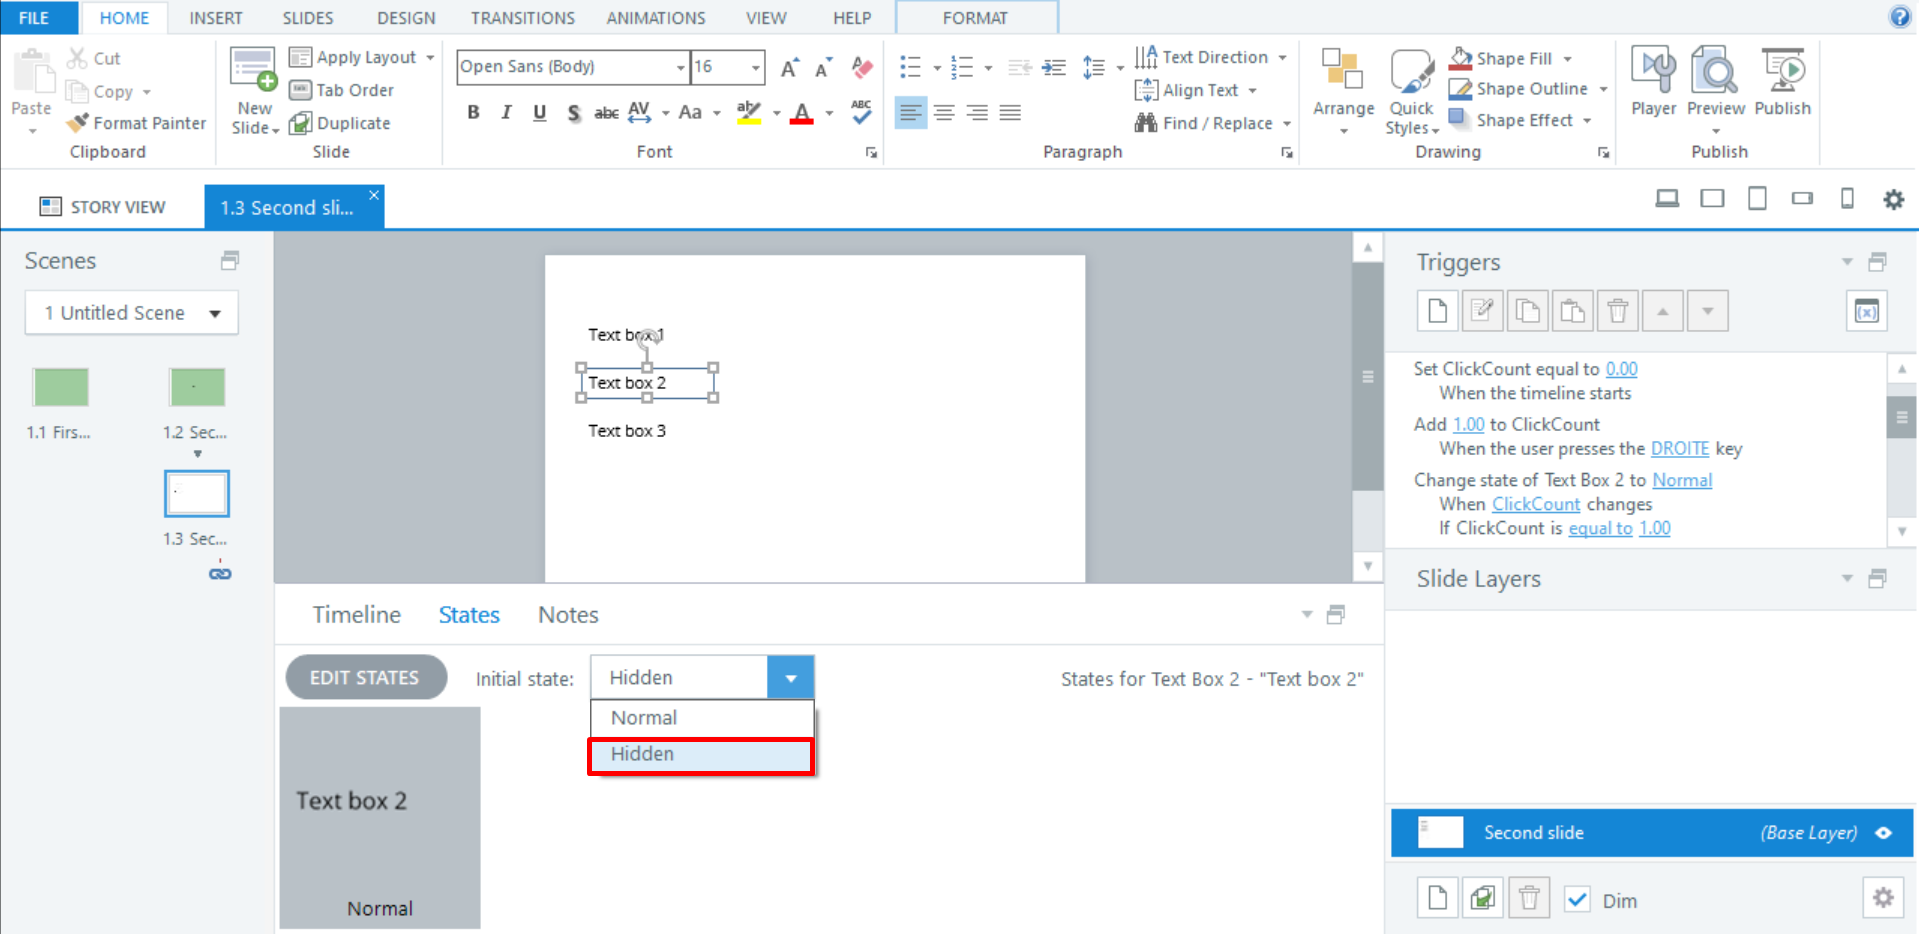
Then, create the following trigger:
Set state of *your shape* to normal
When ClickCount variable changes
If ClickCount = value 1.
If you have more animations, just repeat this step and change the ClickCount value accordingly.
If you have audio files:
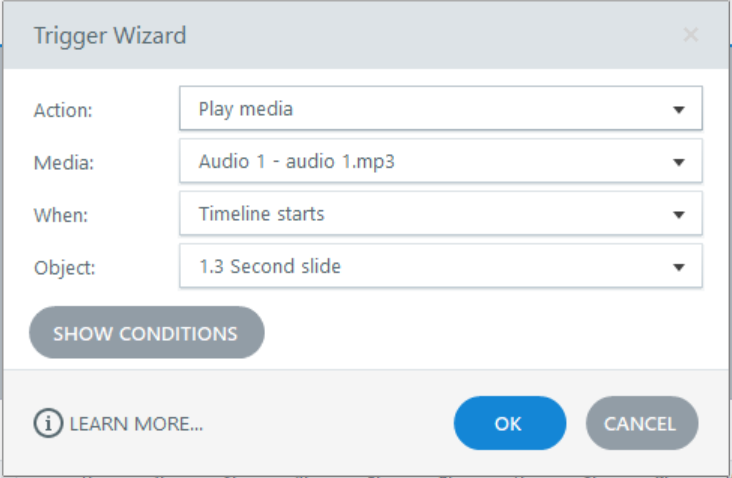
Let’s say that for each textbox that appears, you want an audio file to play and read the text. Just create the following triggers:
Play “audio 1”
When timeline starts on this slide
Then, create the following trigger:
Set state of *your shape* to normal
When ClickCount variable changes
If ClickCount = value 1.
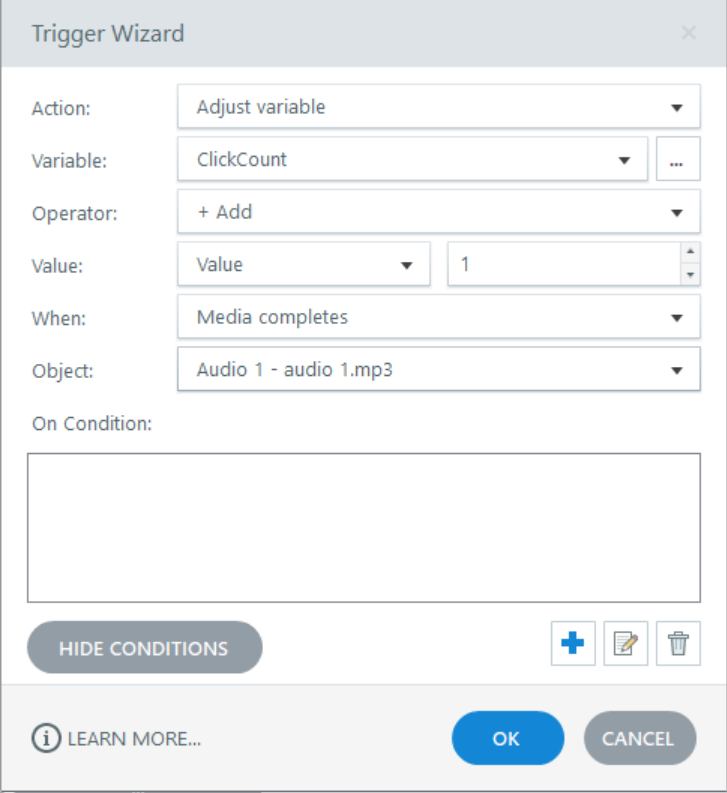
Then create this trigger:
Add value 1 to ClickCount
When “Audio 1” completes
Rinse and repeat for all your audio files:
Add value 1 to ClickCount
When “Audio 2” completes
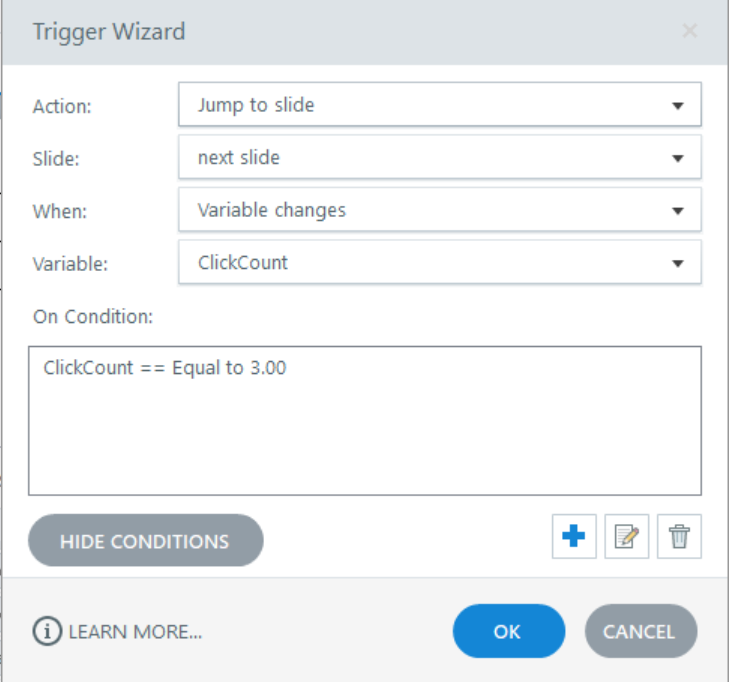
Just don’t do it for your last audio. Instead, create this trigger:
Jump to next slide
When ClickCount changes
If Clickcount value=*the number of clicks/keybord presses needed to get to the following slide*
If you have multiple audios, they will play over each other. Here is what you need to do to avoid this:
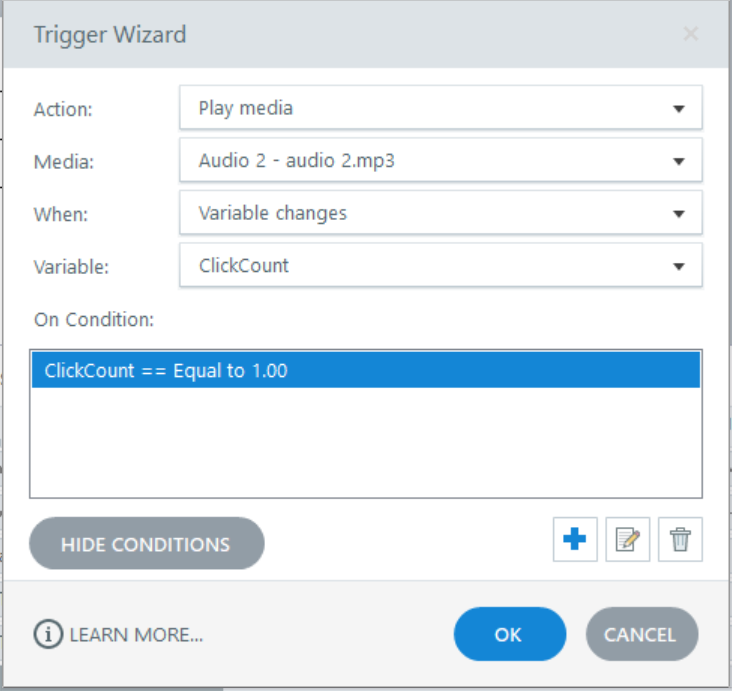
Create the trigger:
Play “audio 2”
When Clickcount variable changes
If Clickcount = value 1
Repeat for all your audio tracks
Then create the trigger:
Stop “audio 1”
When Clickcount changes
If Clickcount is equal or superior to value 1.
Repeat for all your audio tracks

Finally, don’t forget to let your users know how to navigate your training, especially if you remove the previous and next buttons entirely.