Creating Interactive eLearning Videos with AI in Runway
I’ll be honest, tools like Vyond never really clicked for me. They’re clunky, expensive, and the end result often feels underwhelming. I wanted something that gave me more creative freedom, something that could really bring my ideas to life.
But I recently discovered Runway’s Act One feature, and it was exactly what I was looking for. Suddenly, I was making immersive, interactive experiences that felt fresh and exciting. It wasn’t an easy process, but it feels like it opened the door to expressing my ideas in a way I was finally proud of.
Follow along with the video or dive into the article—I’ll walk you through the workflow I used to create interactive AI dialogues and share the lessons I learned, and the shortcuts I wish I’d known earlier.
1. Generating Assets with Midjourney
I started by creating visuals for a doctor and a patient using Midjourney. Since I learned to use Midjourney on their Discord version, that’s my go to, but the website version is probably more user-friendly, so I would recommend starting there.
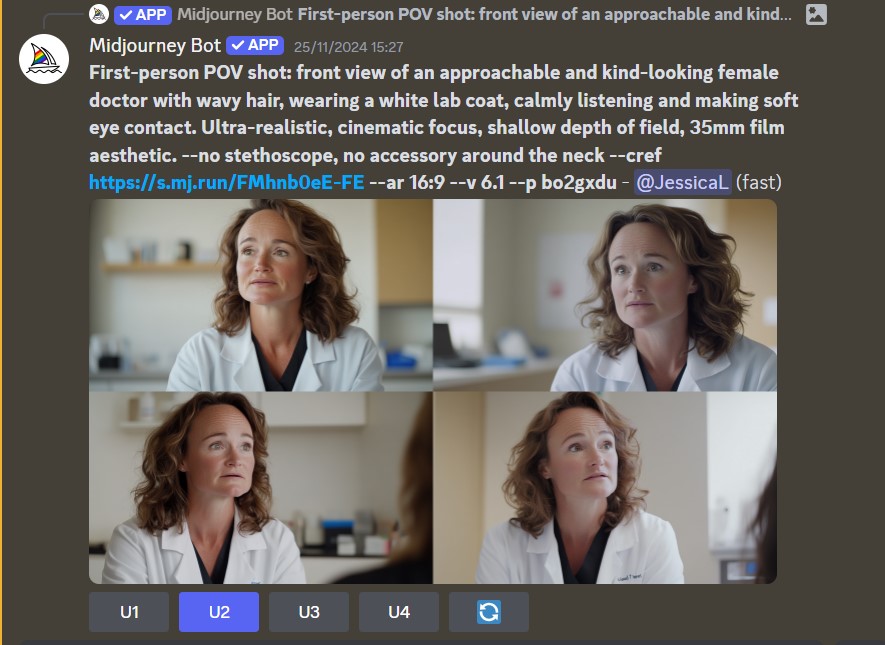
Discord's version of Midjourney
Tip n°1: Create full-body character sheets. Initially, I made the mistake of only generating single poses, which restricted my options later in Runway. Having a variety of poses saves time and frustration down the line. If you realize you want a different pose later, simply crop one from the character sheet, adjust the background if necessary, and bring it into Runway.
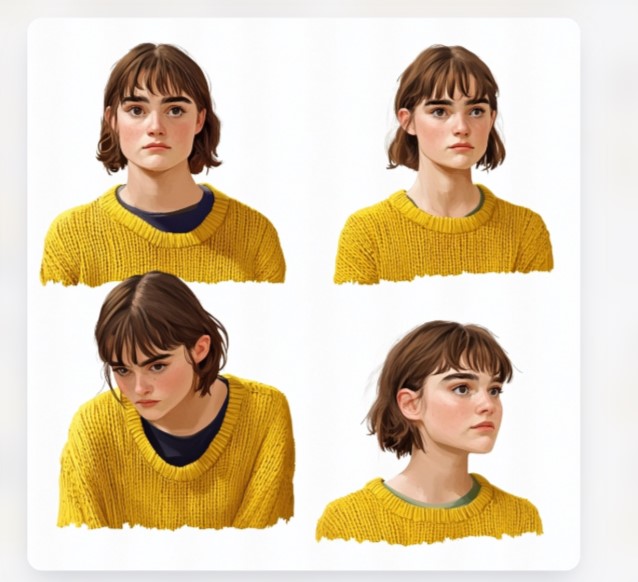
Creating a character sheet after picking a character is tough—face won’t match, and AI adds inconsistencies. Now, I choose based on the best character sheet, not the other way around.
Tip 2: Avoid hands when possible. Midjourney still struggles with realistic hands, so design your shots to minimize them in the frame.

AI hands = nightmare
2. Bringing Characters to Life in Runway
With the characters ready, the next step was creating videos in Runway. There are two approaches:
Text-to-Video: Ideal for simple scenes like intros and outros with light camera movements.
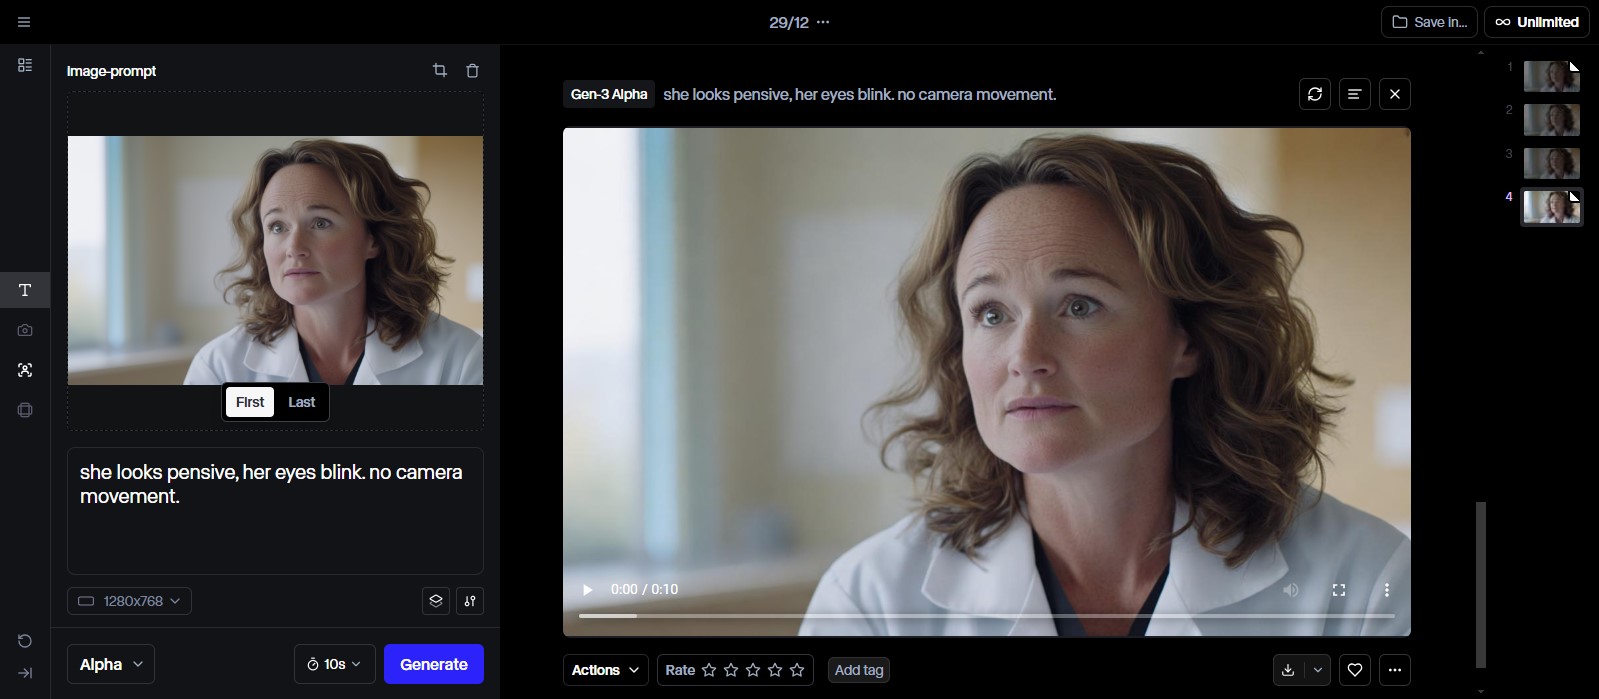
Text-to-Video is only good for simple scenes
Act One: This is where the magic happens for dialogue scenes. I recorded myself performing the characters’ text. You don’t need fancy equipment, but it might take a few takes to get it just right. You’ll have to keep your movements subtle, minimize blinking, and avoid showing too much teeth. Also, pay attention to your audio quality—it’ll be uploaded to ElevenLabs later, so clean sound is important.
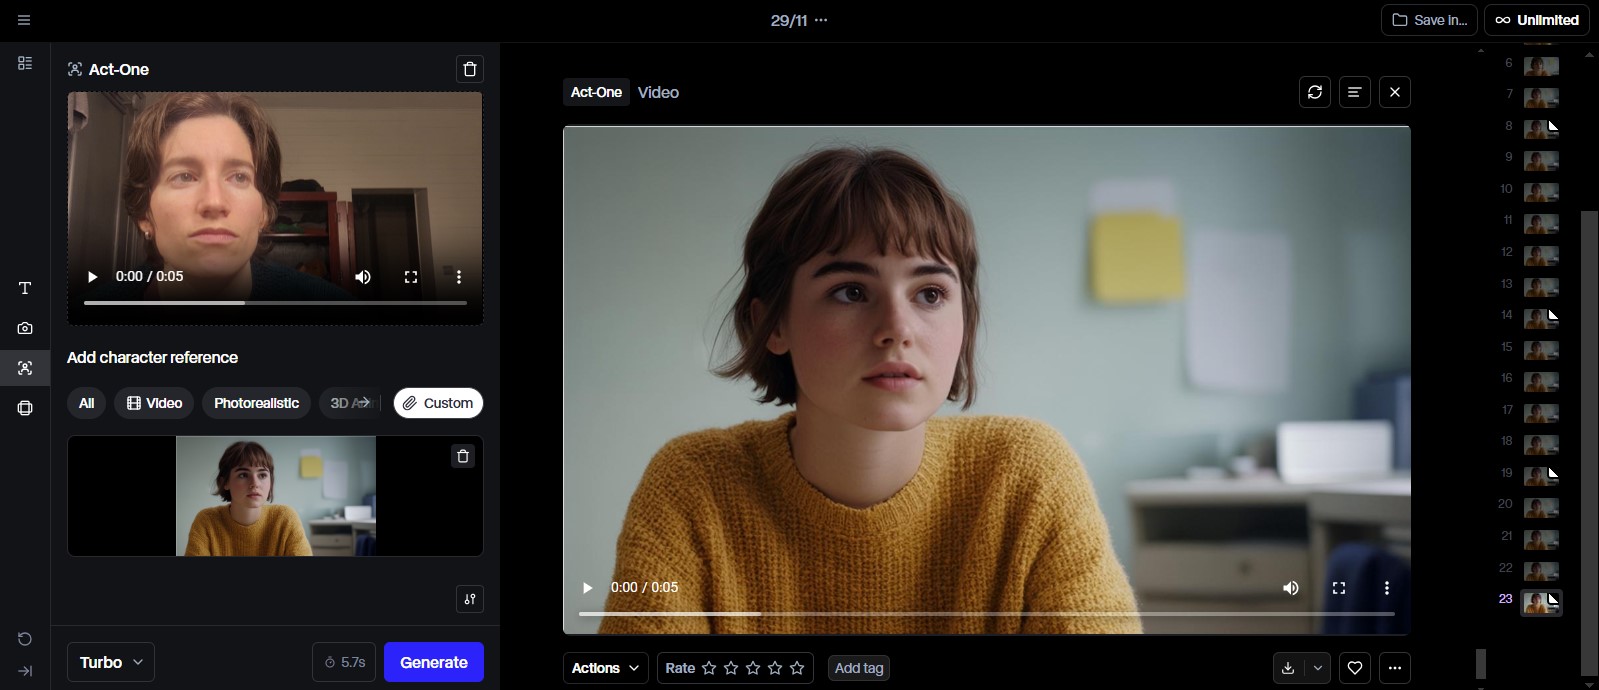
Act-One is amazing, if you're persistent.
Runway’s output quality depends on the quality of your input. If something feels off, you’ll likely need to re-record or adjust your reference image. As of January 2025, it’s not a tool that allows for in-depth tweaking after the fact.
One setting you can control is expressivity. I found that setting it to about 4 out of 5 gives the most natural results. Play around with it to see what works for your project
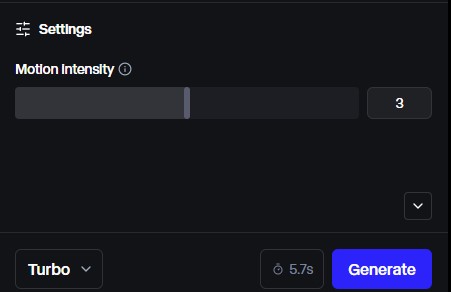
Set motion intensity to 3 at minimum!
3. Replacing Audio with ElevenLabs
Next came the audio. I separated the audio tracks from my videos, which I then uploaded to ElevenLabs.
The standard English model often hallucinated words or phrases I didn’t say and I had much better luck working with the multilingual model.
I also recommend boosting your audio volume (I used Audacity) before uploading it to ElevenLabs, especially if you speak softly. It makes a noticeable difference in accuracy.
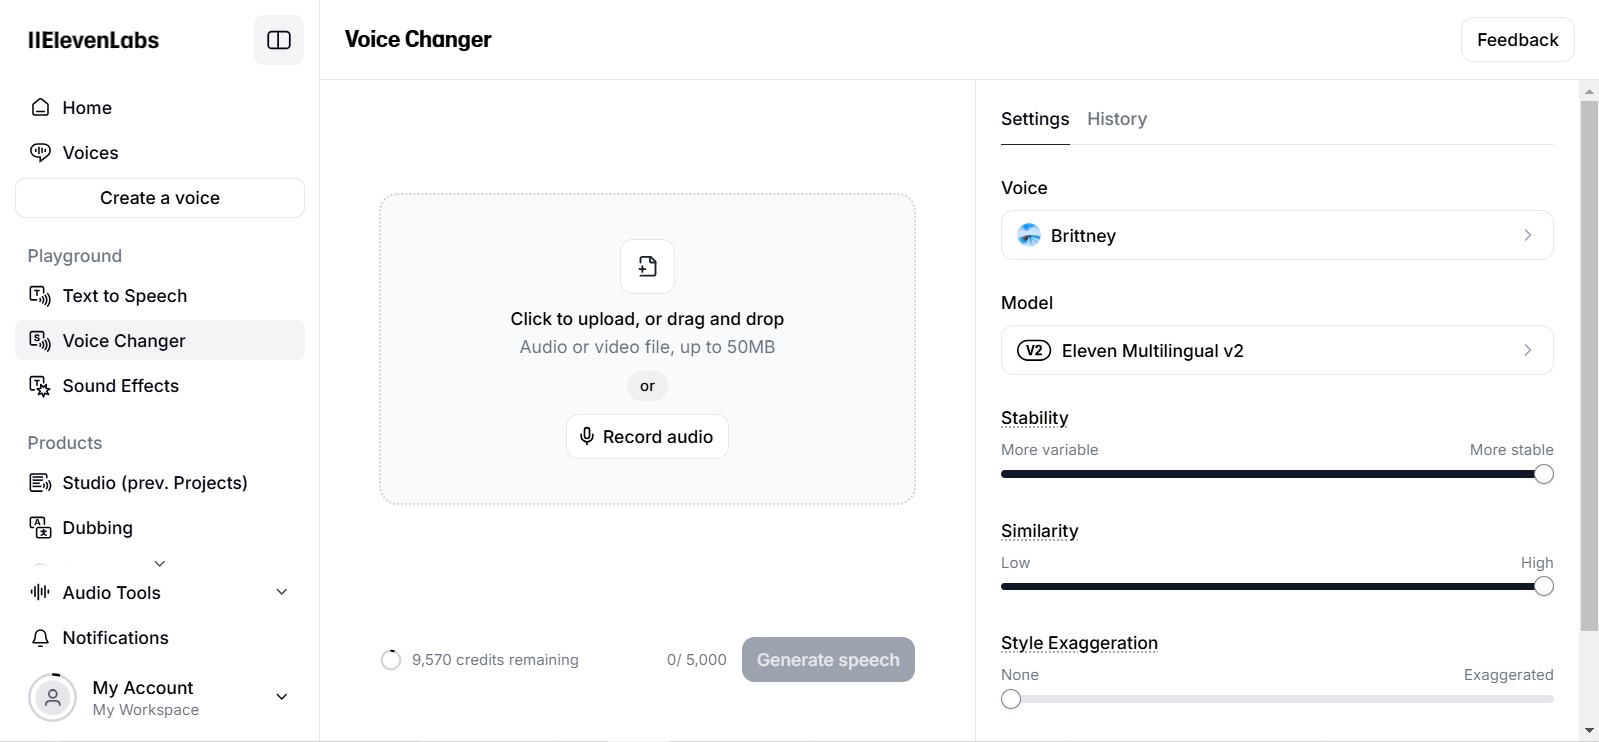
Play around with the different models to see which one works best for you
4. Final Edits in DaVinci Resolve
Once I had the clean audio ready, I swapped out the original tracks in DaVinci Resolve. A quick tip—make sure your audio is set to stereo mode.
To make the videos feel smoother, I bumped up the video speed slightly, somewhere between 105% and 120%. It’s a small change, but it made the movements look much more natural.

Don't discard your AI footage before you've tried increasing its speed.
Since this project involved creating a branching scenario, I had to split it into smaller video clips. To keep everything seamless, I paid extra attention to how each clip started and ended. This made sure the transitions felt smooth, so the final video came together as one cohesive experience.
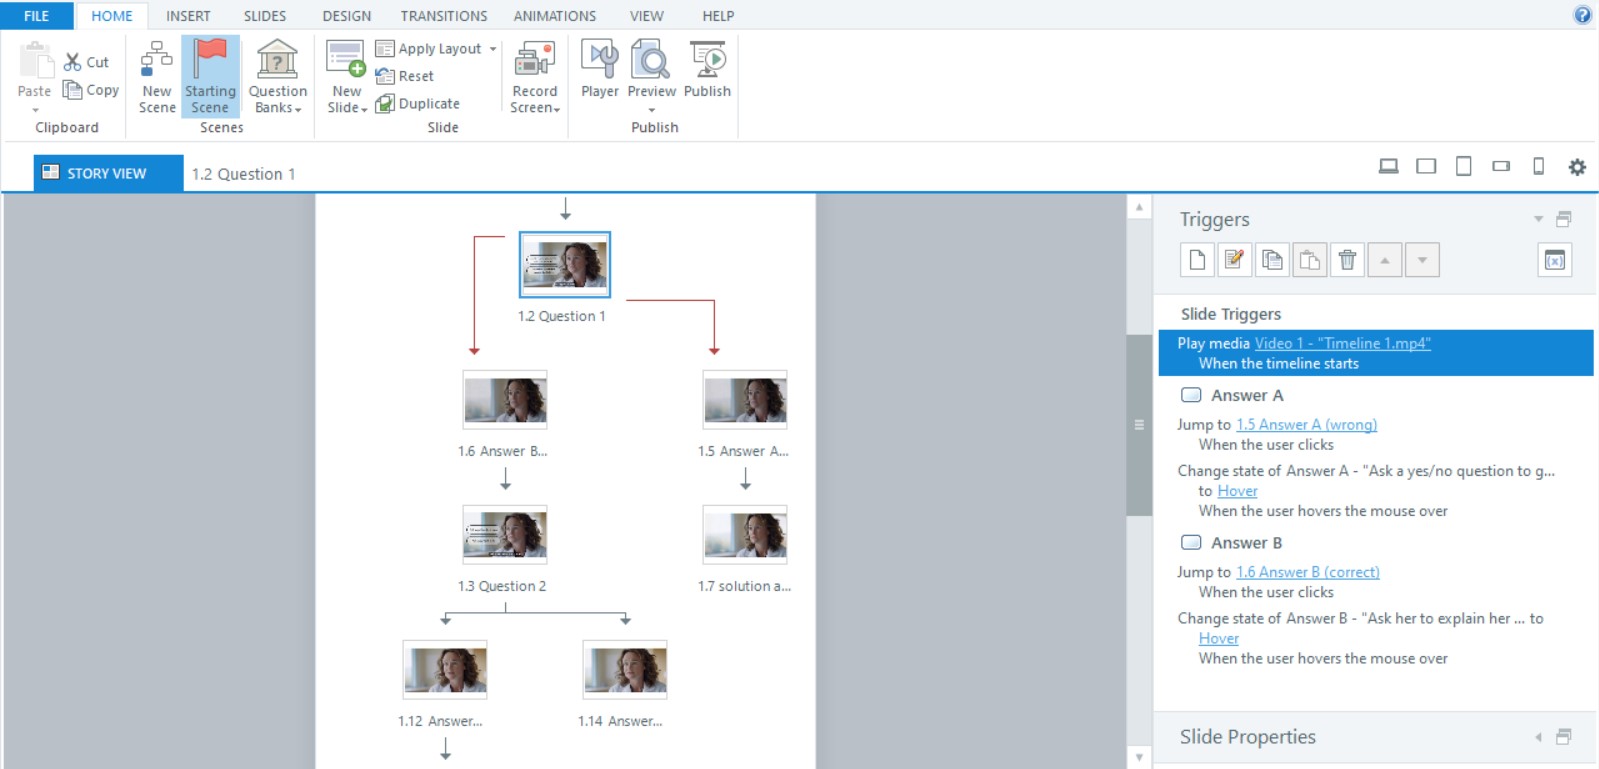
A branching scenario requires breaking the project down into lots of small videos
5. Adding Interactivity with Articulate Storyline
To make the video interactive, I turned to Articulate Storyline. I’ll be honest, I don’t like the company nor their software but it’s the go-to standard in eLearning, so I stuck with it.
If you’re not required to use Storyline, there are other options out there. For example, Construct 3 is a great alternative. At the end of the day, all you really need are buttons and some simple branching logic to let users interact with the video and make their choices.
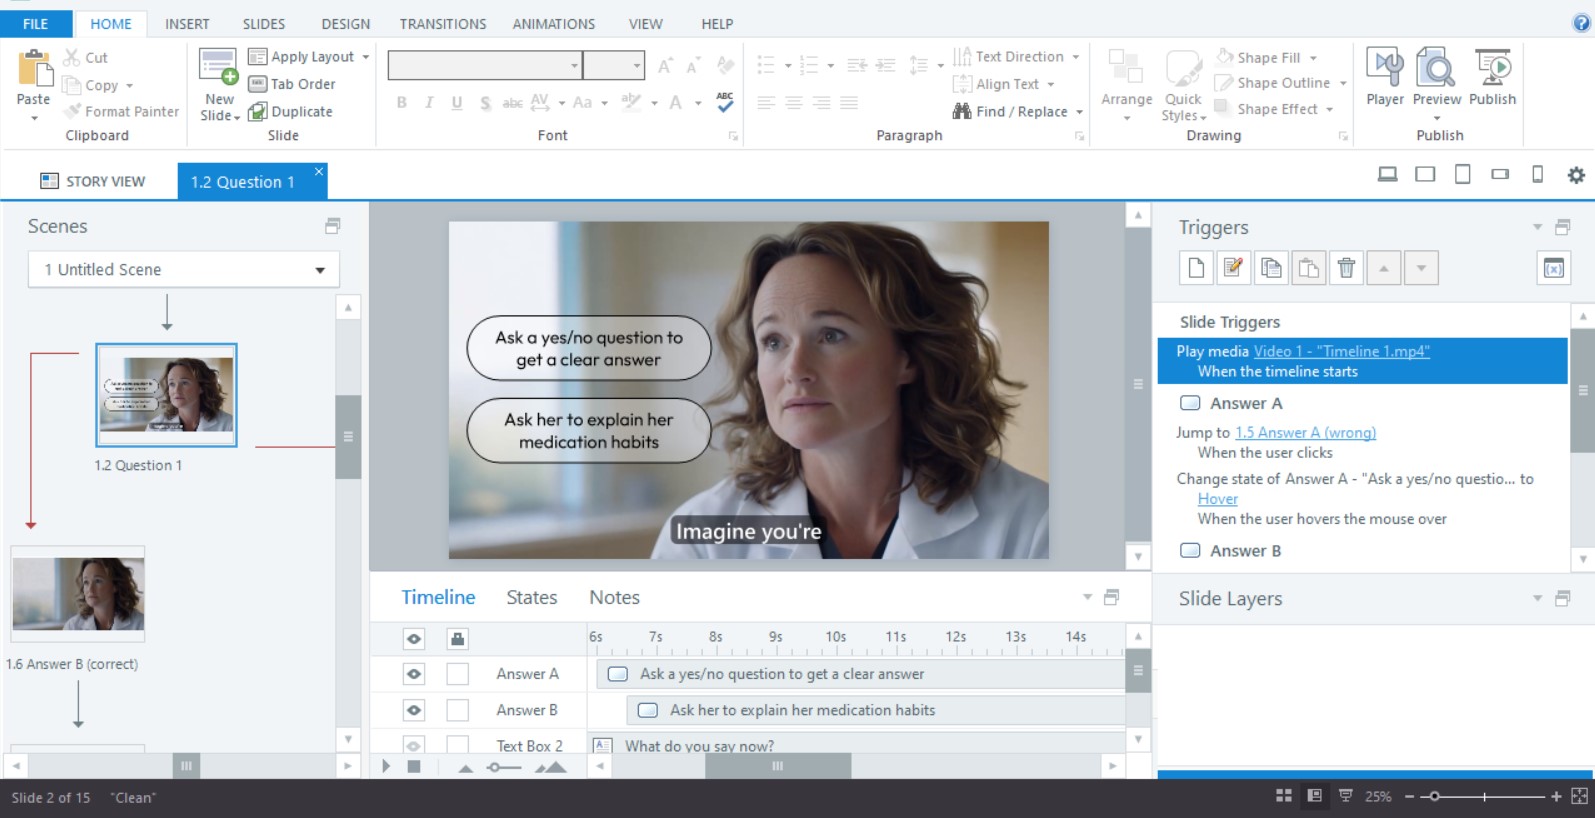
Using Storyline feels like booting up Windows 98 for the first time… every time
Conclusion
This project was a personal experiment to see if AI tools were finally good enough for use in eLearning development. It stemmed from a frustration with tools like Vyond.
Vyond premium subscription costs $89 per month, while unlimited Runway generations for a month cost $95. The quality and capabilities of Runway made it a clear winner. Its ability to produce hyper-realistic, consistent visuals, and seamless lip sync was astonishing, especially considering the infancy of this technology as of January 2025.
I wanted to push the boundaries with the AI tools available today. But as AI advances at an quick pace, and there’s no doubt that even better results will soon be possible.